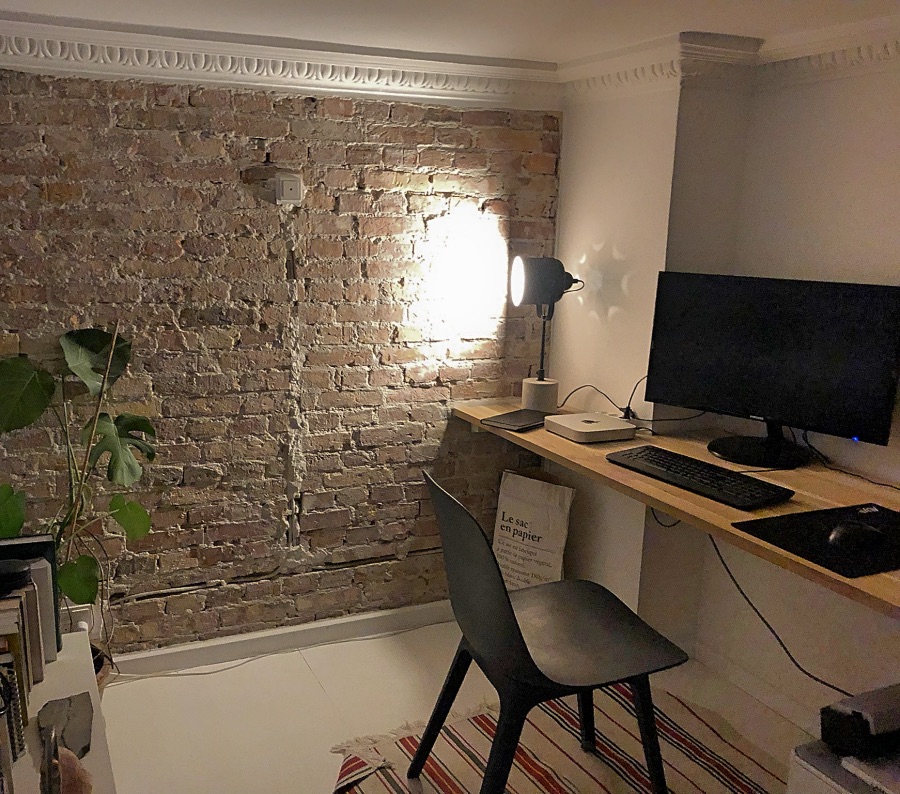
DIY Brick Wall
DIY Brick Wall - 6 easy steps
Have you always dreamed of creating a DIY brick wall but never knew where to begin? The charm of exposed brick can transform a room, adding texture and a rustic, industrial vibe to your space. Fortunately, building your own brick wall is easier than you might think! Just follow these 6 simple steps, and you’ll become a DIY brick wall master in no time!
Step 1: Test your wall
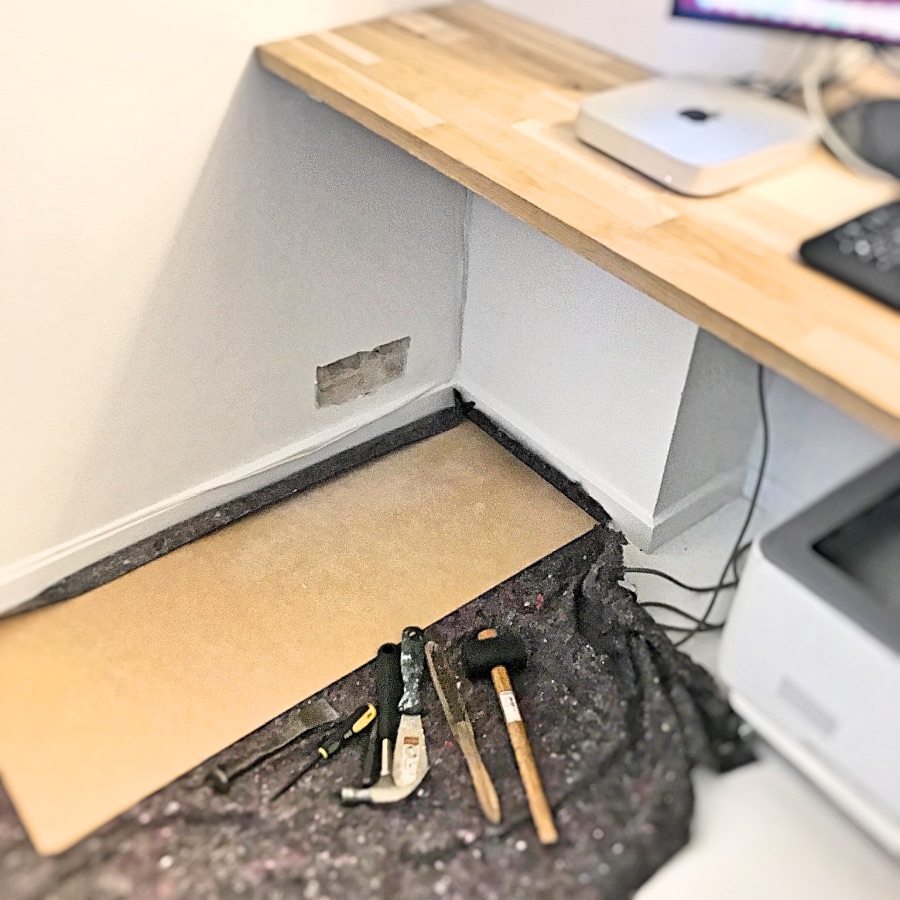
Before diving into your DIY brick wall project, the first step is to confirm that you actually have a brick wall behind the outer layer. Start by covering the floor with protective material to catch any debris. Next, cut a small opening in the wallpaper (TAPET) to peek behind it. Using a hammer and a nail, carefully remove a small section of the outer layer of the wall.
If you find bricks underneath, congratulations! You’re ready to move on to the next step. If not, you might need to consider alternative ways to create the brick effect, like using faux brick panels. But if you’re lucky enough to have real brick behind the surface, this method will give you a genuine and stylish DIY brick wall.
Tools: Hammer, Nail, Utility Knife
Materials: Protective Floor Covering
Step 2: Check larger area
Once you’ve confirmed that there’s a brick wall hiding beneath the surface, it’s time to open up a larger area. Carefully remove more of the outer wall layer, taking your time to avoid damaging the bricks underneath.
After revealing a more extensive section of the wall, take a step back to assess the look and texture of the bricks. We found that our wall had a beautiful, rustic texture that was perfect for our DIY brick wall project, so we decided to go all in!
Pro Tip: Use a paint scraper or putty knife to help lift off stubborn patches of the outer wall layer without harming the bricks.
Tools: Hammer, Paint Scraper, Putty Knife
Materials: Drop Cloths

Step 3: Dust protection
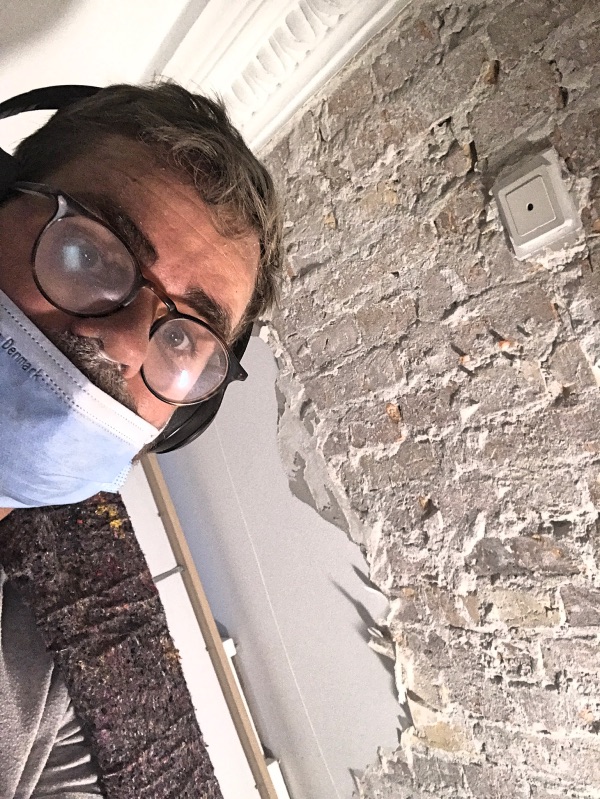
The process of exposing a DIY brick wall creates a lot of dust, so it’s essential to protect yourself and your space. We quickly realized the importance of building a dust shield around the area, although our first attempt wasn’t entirely successful. Nevertheless, any barrier is better than none!
Use plastic sheets or tarp to cover furniture and other items in the room. Additionally, make sure to protect yourself with a mask and safety glasses to avoid inhaling dust and debris.
Pro Tip: Seal off the area with plastic sheeting and use painter’s tape to cover doorways to minimize the spread of dust to other parts of the house.
Tools: Plastic Sheets, Mask, Safety Glasses, Painter’s Tape
Materials: Tarp, Dust Mask
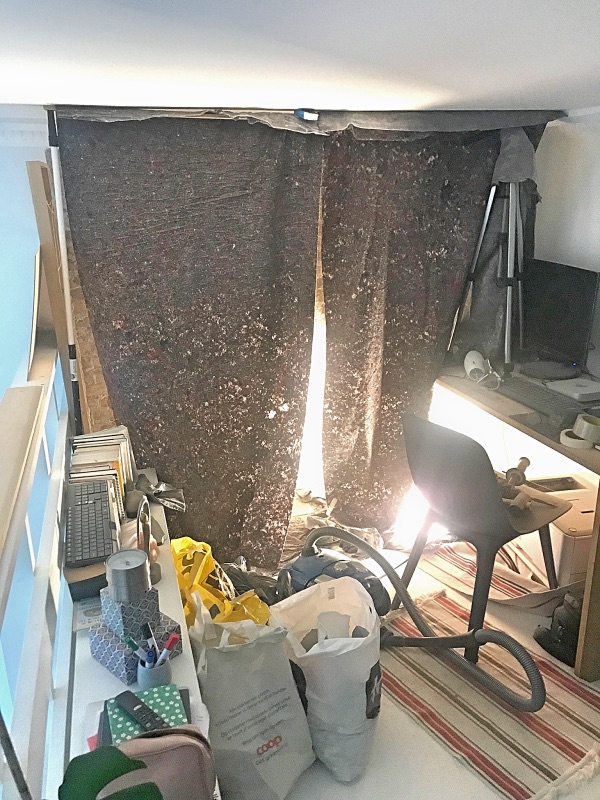
Do remember to protect yourself with mask and glasses.
Step 4: Use a hammer-drill and go crazy
Now, it’s time for the real fun to begin! With your protective gear on, use a hammer drill with a flat chisel head to break away the outer plaster or drywall layer. This tool speeds up the process and makes it much easier to reveal the beautiful bricks beneath. While the hammer drill isn’t usually on our list of essential handyman tools, it was an absolute lifesaver for this particular project!
Take care not to damage the bricks as you remove the outer layer. Work in small sections, and use gentle pressure to avoid chipping or cracking the brickwork. Patience is key here; go at a steady pace to achieve the best results.
Tools: Hammer Drill, Flat Chisel Head
Materials: Dust Mask, Safety Glasses

Step 5: Steel-brushing the DIY Brick Wall
After you’ve removed all of the outer wall material, it’s time to brush off the bricks to get rid of any loose debris and heavy dust particles. A steel brush works perfectly for this task, as it can scrape away stubborn bits of dust and dirt without damaging the brick surface.
Use firm, sweeping motions with the steel brush to clean off the bricks, revealing their natural color and texture. This step is crucial for achieving the classic, raw look of an exposed DIY brick wall.
Tools: Steel Brush
Materials: Protective Gloves

Step 6: Wash with water and done!
The final step to completing your DIY brick wall is to wash it down with water and a plastic brush. This step helps to remove any remaining dust and gives the bricks a clean, polished look. Gently scrub the wall with water, making sure not to saturate it too much.
Once you’ve washed the bricks and they’re dry, consider applying a sealing paint or clear coat. This optional step helps to keep the wall from shedding dust each time someone touches it. A sealing coat also enhances the brick’s color and texture, giving your DIY wall a professional finish.
Tools: Plastic Brush, Spray Bottle
Materials: Water, Clear Sealing Paint (Optional)
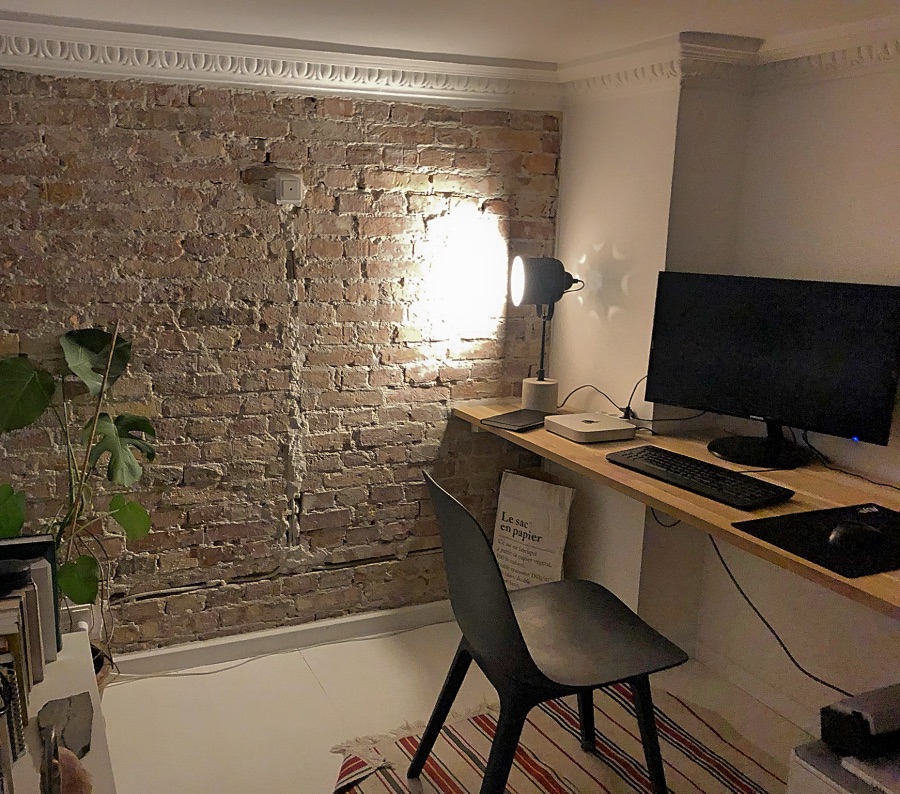
And There You Have It!
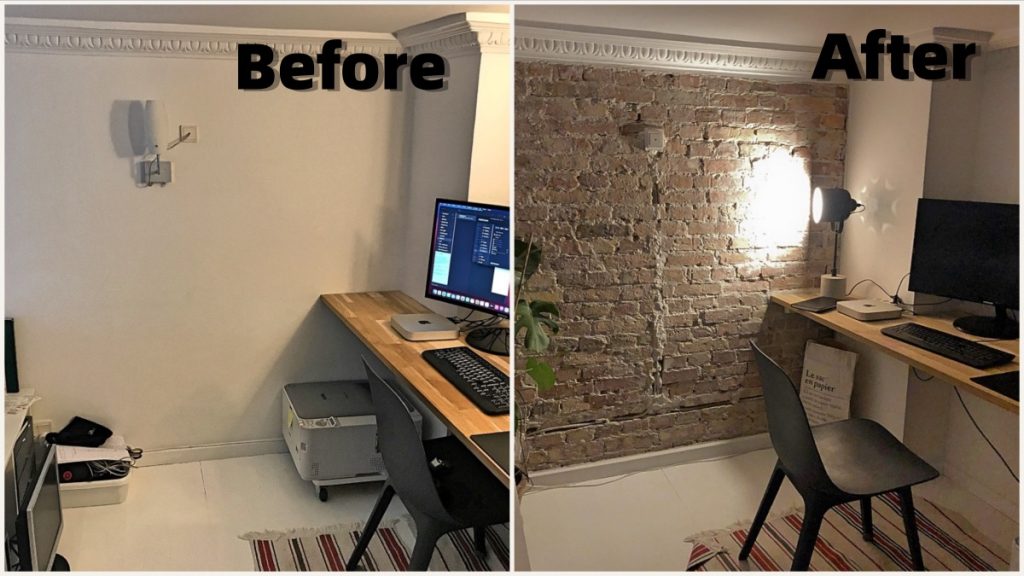
Your DIY brick wall is now complete! With just a few simple steps and a bit of patience, you’ve transformed a plain wall into a stunning, rustic feature that adds character and style to any room. The beauty of a brick wall is in its imperfections, so don’t stress over minor flaws – they add to the authentic, raw aesthetic that makes brick walls so popular.
Extra-stories from the loft area
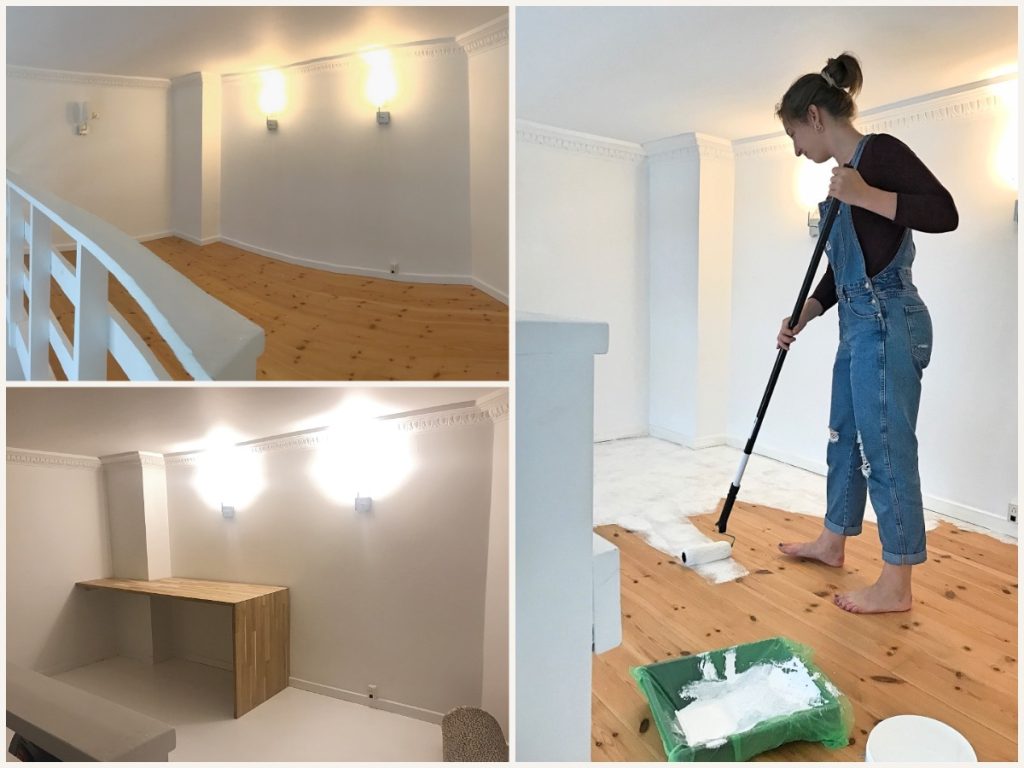
Before we embarked on this DIY brick wall journey, we did a lot of redesigns in our loft area, including painting the floors, building an office table, and revamping the handrail to create a New York loft-inspired look. If you’re interested in other DIY projects that complement your brick wall, feel free to explore the following articles:
These projects show how a DIY brick wall can seamlessly fit into various design themes, enhancing the overall aesthetic of your home.
Final Thoughts on Creating a DIY Brick Wall
Building a DIY brick wall is a straightforward yet highly impactful way to change the look and feel of a room. With just a few tools, a bit of elbow grease, and some creativity, you can bring warmth and character to your space. The natural texture of exposed brick creates a focal point that suits both modern and vintage styles.
So, if you’ve ever hesitated to start your own brick wall project, now is the time to go for it! Follow these six simple steps, and you’ll be on your way to having a stunning DIY brick wall that everyone will admire.
redesigndiy.com
Recent Posts
GET IN TOUCH
Copyright @ 2024 - Redesign DIY


