How to build a Home Bar on a budget
How to build a home bar on a budget
Have you always dreamed of having a stylish home bar but assumed it would be too complicated or expensive? The good news is that building a home bar can be both simple and budget-friendly! In this guide, I’ll show you exactly how to build a home bar on a budget with just a few materials and some creativity. Follow this step-by-step process, and you’ll have your dream home bar in no time!

Before we started: The original setup
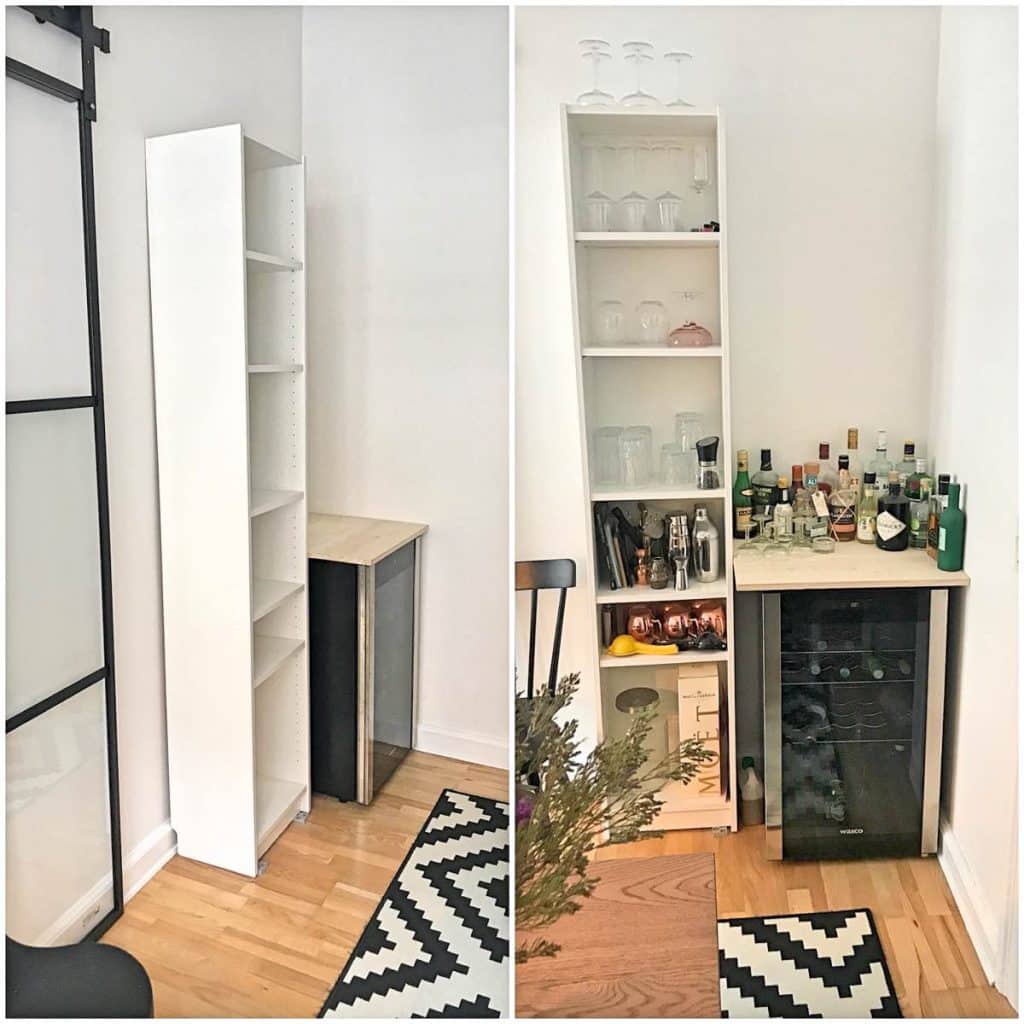
This is what our space looked like before we began the home bar transformation. We had a wine fridge that we topped with a leftover table, and beside it, we placed a tall IKEA unit we had lying around. While this setup was functional, it didn’t have the stylish, cohesive look we wanted for a home bar. So, we decided to start fresh and build a home bar on a budget that would fit seamlessly into our space.
Step 1: Install Ikea kitchen drawer and wine-fridge
To kick off our home bar build, we purchased an IKEA kitchen unit with three drawers. The bottom drawer was perfect for storing bottles, while the top two drawers were reserved for cocktail tools and glassware. This drawer unit added both storage and a polished look to the bar area.
Before installing the unit and wine fridge, we built a small foundation using leftover wooden planks to create a sturdy base for both elements. Then, we painted the wall behind the bar to visually separate this space from the rest of the room. Luckily, we had leftover paint from our bedroom renovation (you can read about that here).
Pro Tip: Repurpose leftover materials whenever possible to build a home bar on a budget. Not only does it save money, but it also gives a personalized touch to your project.
Tools: Screwdriver, Paintbrush, Saw
Materials: IKEA Kitchen Drawer, Wine Fridge, Leftover Paint, Wooden Planks

Step 2: Hang up the shelves
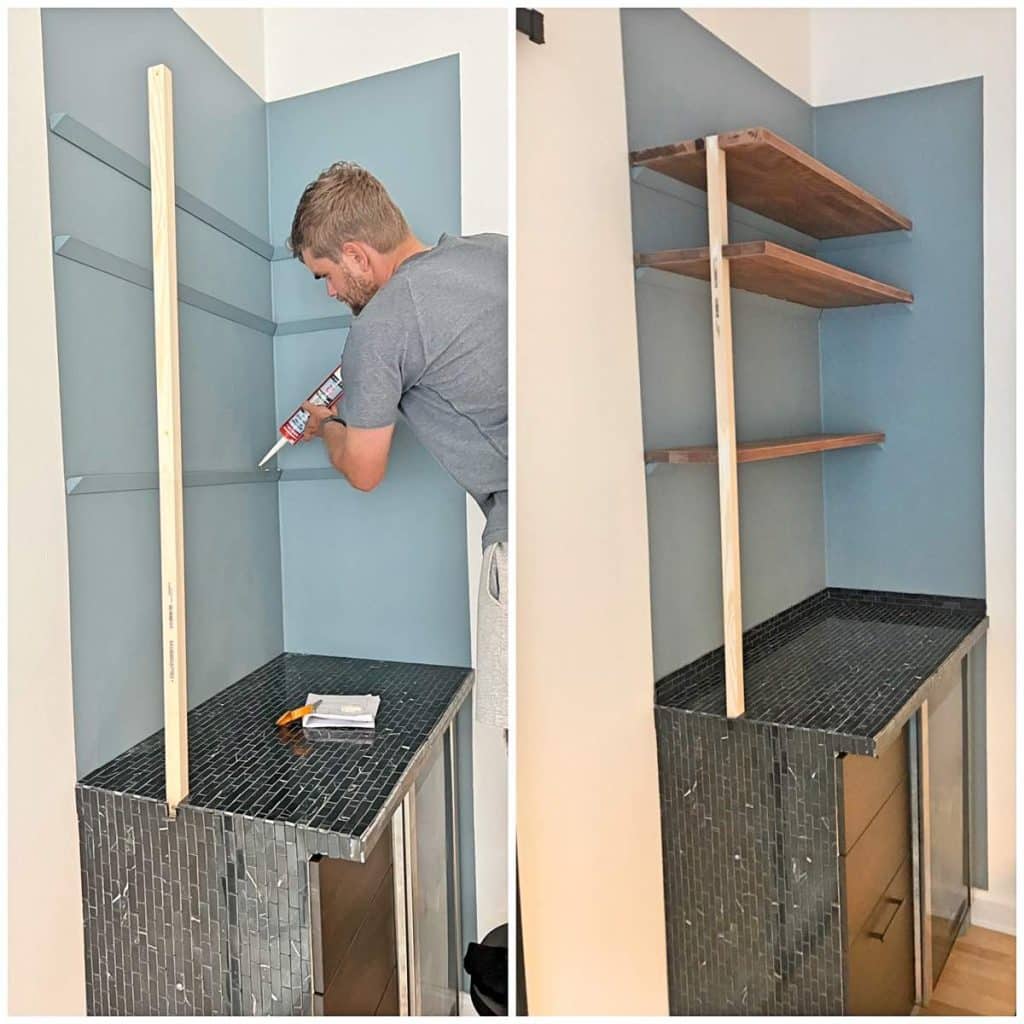
With the wine fridge and drawer unit in place, the next step was to install shelves for storing bottles and glasses. We were fortunate to find a piece of dark wood in a container outside our apartment that was perfect for this purpose. Using a circular saw, we cut the wood into three shelves to fit the space.
For a more unique look, we created a frame using triangular wooden pieces that we screwed into the wall to support the shelves. This method required a bit more effort but added to the industrial-chic vibe of our home bar.
Pro Tip: Look for reclaimed or scrap wood to create shelves. Not only does this save money on your DIY project, but it also adds character and a rustic charm to the space.
Tools: Circular Saw, Screwdriver, Level
Materials: Wooden Planks, Screws, Wall Anchors

Step 3: Add a Mosaic Countertop
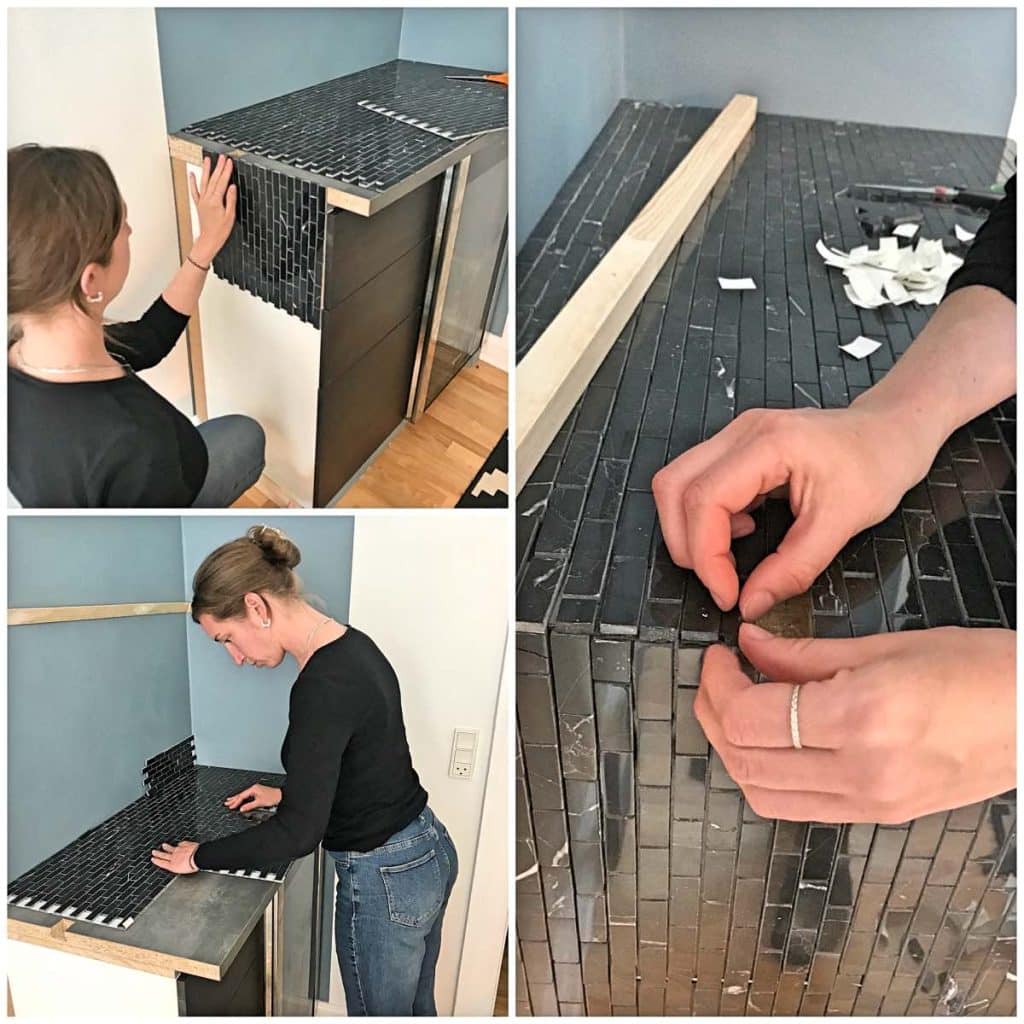
Initially, we wanted to find a black marble tabletop to use for the bar. However, pre-cut marble pieces were way too expensive, and we didn’t have the tools to cut a slab ourselves. To build a home bar on a budget, we decided to use mosaic tiles instead!
We discovered a fantastic mosaic system at Bauhaus, which comes with super sticky adhesive on the back. This system allowed us to quickly and easily lay down the mosaic tiles on the tabletop. After cutting a few pieces to fit the corners, the mosaic surface was complete! Without this product, covering the bar would have taken much longer, but we managed to finish in just a few hours.
Pro Tip: Using mosaic tiles is a cost-effective way to add a luxe feel to your bar. Look for self-adhesive mosaic tiles to save time and simplify the process.
Tools: Utility Knife, Tile Cutter (if needed)
Materials: Mosaic Tile Sheets, Adhesive (if not pre-attached)
Step 4: Final attachments and paint
With the mosaic surface in place, the next step was to attach the shelves and touch up the paint. We painted the shelf holders with a matte black finish to match the rest of the bar’s aesthetic. Once the paint was dry, we secured everything in place, making sure each element was level and properly aligned.
Pro Tip: Use a quick-drying paint to speed up the process, especially if you’re working on tight deadlines or need to layer coats.
Tools: Paintbrush, Level, Screwdriver
Materials: Paint, Screws
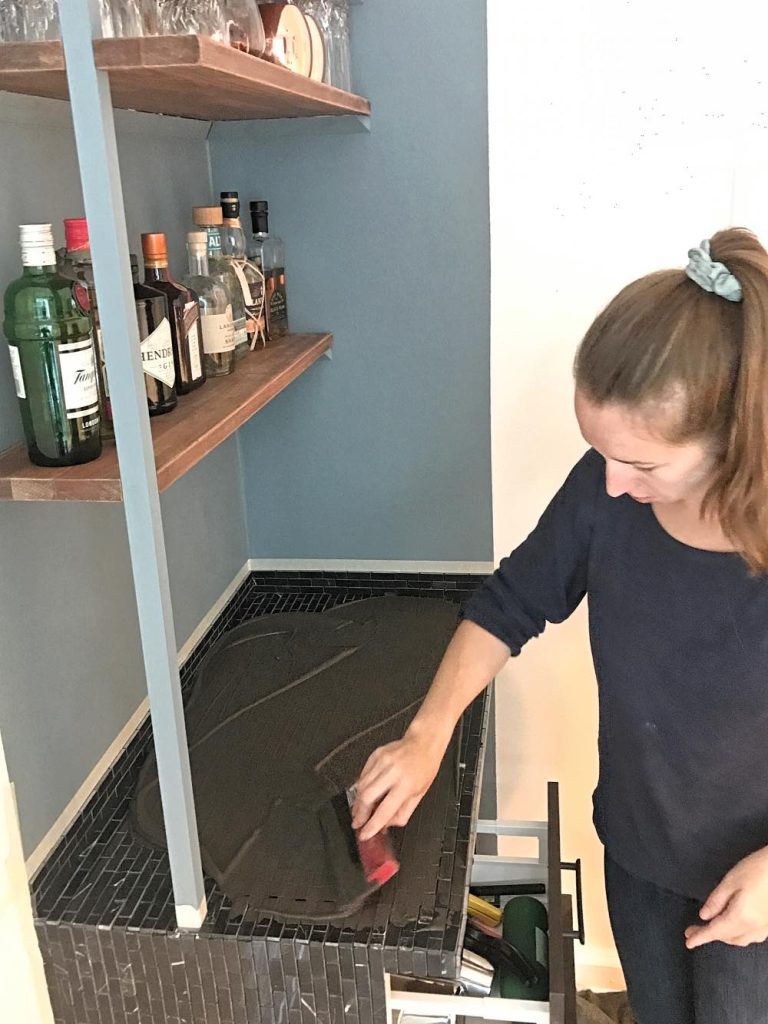
Step 5: Add filler between mosaic
The final touch to our home bar build was adding filler between the mosaic tiles. We used a dark grey filler to match the tiles and create a sleek, uniform surface. This step not only completed the look but also made the surface waterproof—an essential feature for any home bar.
After applying the filler, we wiped off the excess and let it set. This finishing detail not only enhanced the aesthetic of the bar but also made it more durable for everyday use.
Pro Tip: Choose a waterproof filler to protect the surface from spills and stains, ensuring your bar stays in top condition for years to come.
Tools: Grout Float, Sponge
Materials: Dark Grey Filler, Water
Final result
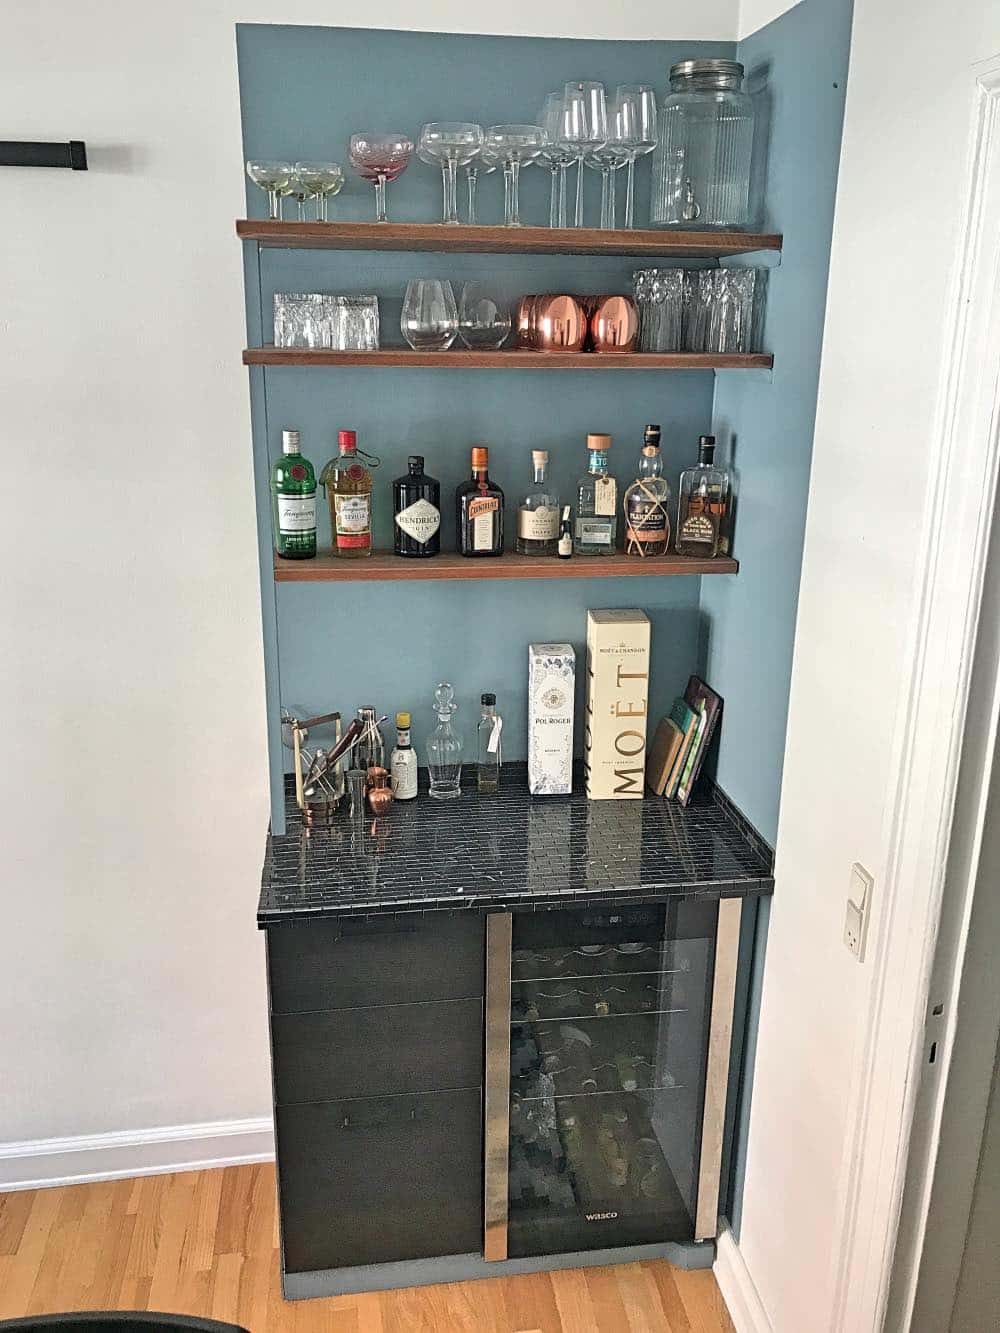
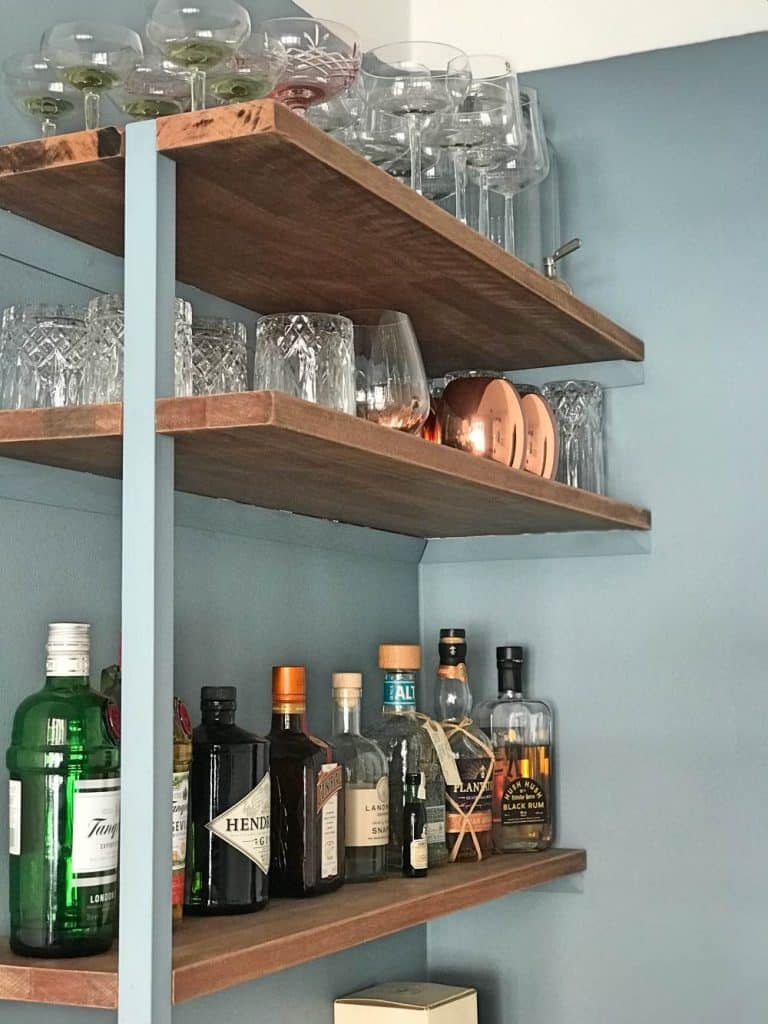
And there you have it! We successfully created a stylish home bar on a budget that fits seamlessly into our space. The combination of repurposed materials, budget-friendly finds, and a bit of creativity allowed us to build a bar that looks high-end without the hefty price tag.
By using mosaic tiles, leftover wood, and affordable IKEA furniture, we kept the total cost around $700. With some careful planning and a bit of DIY effort, you too can build a home bar that adds both functionality and style to your living space.

Final Thoughts: How to Build a Home Bar on a Budget
Building a home bar doesn’t have to break the bank. With some smart shopping, repurposing materials, and a little creativity, you can create a stunning, custom bar for your home. The key to building a home bar on a budget is to be flexible with materials and think outside the box—sometimes a simple change, like using mosaic tiles instead of marble, can make all the difference in both cost and style.
Ready to create your own home bar? Use this guide to get started, and you’ll have the perfect spot to entertain guests or unwind after a long day. Cheers to DIYing on a budget!
redesigndiy.com
Recent Posts
GET IN TOUCH
Copyright @ 2024 - Redesign DIY


