5 Phases of every DIY project
The 5 Phases of Every DIY Project: An In-Depth Guide to Success
Embarking on a DIY project can be both exciting and daunting. Whether you’re painting a room, building furniture, or creating a piece of home decor, every DIY project follows a similar path from start to finish. The key to success is understanding the 5 phases of every DIY project and preparing for each step. In this comprehensive guide, we’ll walk you through each phase to help you enjoy a smoother, more successful DIY journey.
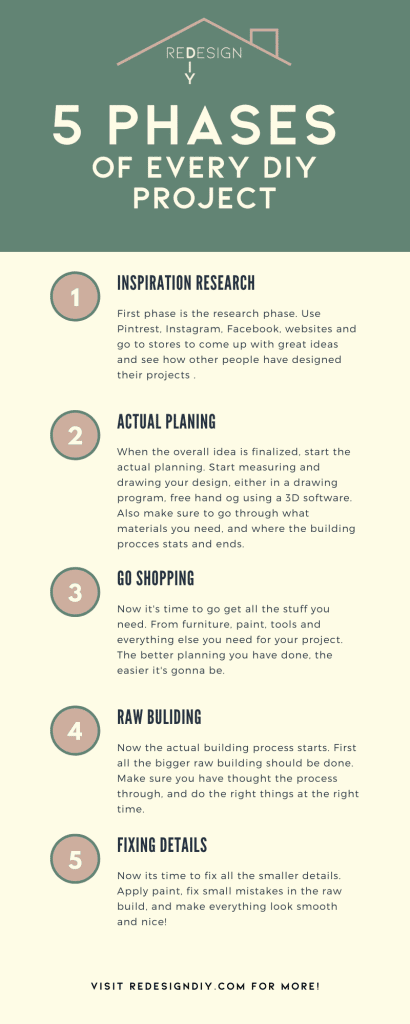
Phase 1: Inspiration – Where Ideas Take Flight
The first of the 5 phases of every DIY project is the inspiration phase. This is where your ideas come to life and the foundation of your project is built. Inspiration can come from anywhere: a stunning Pinterest board, a stroll through nature, a home decor magazine, or simply the desire to refresh a space in your home.
Finding Inspiration:
- Online Sources: Platforms like Pinterest, Instagram, and YouTube are treasure troves for DIY enthusiasts. Pinterest is ideal for finding ideas ranging from small crafts to full-scale renovations. YouTube offers not only inspiration but also step-by-step tutorials. Instagram design influencers showcase a variety of styles and often link directly to the materials used.
- Home Decor Magazines and Books: Sometimes, stepping away from screens can spark creativity. Browse through magazines like Architectural Digest, Better Homes & Gardens, or Real Simple for unique ideas. Books focused on interior design, woodworking, or crafts are also great sources.
- Real-Life Inspirations: Visiting home improvement stores, art galleries, or even a friend’s home can help you visualize textures, colors, and designs in person.
Defining Your Goals: In this phase, define what you want to achieve with your project. Consider these questions:
- What is the purpose of the project—functionality, aesthetics, or both?
- What style or theme do I want to incorporate?
- What is my budget and timeline?
Write down your goals, ideas, and a rough sketch of the final product. This mental or physical outline will be your guide as you move forward through the remaining phases of every DIY project.
Phase 2: Planning – The Blueprint of Success
The second of the 5 phases of every DIY project is planning. This is where inspiration meets action, and dreams are converted into concrete steps.
Creating a Detailed Plan:
- Sketch Your Ideas: If your project involves a design element, sketch out your ideas. It doesn’t need to be professional—simple diagrams help visualize the outcome.
- Make a List of Materials: Break down every component and list all the materials required. Be specific about sizes, quantities, and types. For example, if you’re building a shelf, list the exact dimensions of wood, types of screws, paint colors, etc.
- Research Costs: With your material list ready, research prices online or at local stores. Price comparisons can help you find budget-friendly options without sacrificing quality.
Setting a Realistic Timeline: Setting a realistic timeline is crucial for any DIY project. Some projects take just a few hours, while others may span weeks. Consider factors like drying time for paint, curing time for adhesives, or delivery times for custom-ordered materials. A well-planned timeline helps keep the project on track and reduces frustration.
Phase 3: Preparation – Ready, Set, Prep!
Preparation is the third phase of the 5 phases of every DIY project, and it often separates a smooth DIY experience from one riddled with setbacks.
Gathering Supplies: Double-check your materials list and gather everything you’ll need before starting. Being halfway through a project only to realize you’re missing a key component can be frustrating and time-consuming.
Setting Up Your Workspace:
- Space: Choose a well-ventilated area, especially if you’re using paints or chemicals. Ensure there’s enough room to move around and accommodate your tools.
- Protect Your Area: Use drop cloths, tarps, or old newspapers to protect floors and furniture from spills or scratches.
- Organize Your Tools: Lay out all necessary tools in an accessible manner to prevent interruptions during your workflow.
Safety First: Don’t forget safety equipment like gloves, goggles, or masks if your project involves hazardous materials. Safety is paramount and ensures an enjoyable DIY process.
Phase 4: Execution – Bringing Your Vision to Life
The fourth of the 5 phases of every DIY project is where your hard work starts to pay off: the execution phase. With all your planning and preparation in place, it’s time to roll up your sleeves and bring your project to life.
Step-by-Step Approach: Work methodically and take your time. If you’re following a tutorial, go through each step carefully. Rushing through this phase can lead to mistakes that may require costly fixes or even starting over.
Troubleshooting on the Fly: Even with meticulous planning, unexpected issues can arise. Maybe the paint doesn’t go on smoothly, or a piece of wood doesn’t fit as expected. When problems occur:
- Re-evaluate: Take a moment to assess the issue and brainstorm potential solutions.
- Consult Resources: Look online for solutions. DIY communities on forums and social media are often willing to share advice and tips.
Patience is key in this phase. Every project has its challenges, but with persistence, you can overcome obstacles and keep moving forward.
Phase 5: Completion and Reflection – Celebrating Your Success
You’ve reached the final phase of the 5 phases of every DIY project—completion. Now it’s time to step back and admire your hard work.
The Final Touches: Add the finishing touches that bring your project to life. This might include applying a final coat of paint, installing hardware, or arranging your new creation in its designated space. These details enhance the overall aesthetic and complete your project.
Reflect and Learn: Every project is a learning experience. Take some time to reflect:
- What went well?
- What challenges did you encounter, and how did you overcome them?
- What would you do differently next time?
Reflection helps improve your skills and prepares you for future DIY endeavors. Understanding what worked and what didn’t will make your next project even more successful.
Conclusion: Embrace the 5 Phases of Every DIY Project
Every DIY project is a journey through these 5 phases. By understanding and embracing each phase, you ensure that your projects are both successful and enjoyable. From the initial spark of inspiration to the final reveal, every stage offers valuable lessons and rewarding experiences. So, take your time, savor each step, and most importantly, have fun creating something uniquely yours!
Now that you know what to expect in each phase, you’re ready to tackle your next DIY project with confidence. Happy crafting!

redesigndiy.com
Recent Posts
GET IN TOUCH
Copyright @ 2024 - Redesign DIY


